Your braking system is one of the most important safety features in your vehicle. Over time, air can get trapped in the brake lines, leading to reduced stopping power, longer braking distances, and in extreme cases, brake failure.
Bleeding your brakes removes air and restores proper brake function. In this guide, we’ll walk you through how to bleed brakes by yourself, saving you time and money while keeping your car safe on the road.
Why is Bleeding Your Brakes Important?
Your braking system relies on hydraulic pressure to stop your vehicle. When you press the brake pedal, brake fluid moves through the brake lines, transferring force to the calipers or wheel cylinders, which then engage the brake pads to slow or stop the wheels.
If air gets into the brake lines, it compresses under pressure, unlike brake fluid, which is incompressible. This results in reduced braking efficiency, a spongy pedal, and longer stopping distances. In severe cases, air pockets can lead to brake failure, putting you and others at risk on the road.
Bleeding your brakes removes trapped air and restores proper hydraulic pressure, ensuring consistent braking performance. It also helps remove old, contaminated fluid, which can lead to corrosion, seal deterioration, and reduced braking power over time.
By bleeding your brakes regularly, you:
-
Improve pedal feel and responsiveness.
-
Maintain consistent stopping power.
-
Prevent premature wear on brake components.
-
Reduce the risk of brake failure in emergencies.
How Often Should You Bleed Your Brakes?
Brake bleeding should be part of regular maintenance. Most manufacturers recommend replacing brake fluid every two to three years. However, there are situations where bleeding is needed sooner.
Signs That Your Brakes Need Bleeding

A few warning signs indicate it’s time to bleed your brakes:
-
Spongy or Soft Brake Pedal (or Brake Lever): The brake pedal feels mushy, unresponsive, or sinks to the floor when pressed. You may have to pump the brakes or press harder than usual to stop the vehicle.
-
Delayed or Weak Braking: The vehicle takes longer to stop, even with normal pressure on the pedal. Braking may feel inconsistent—sometimes firm, sometimes weak—due to air disrupting hydraulic pressure.
-
Brake Fluid Looks Dirty: The fluid in the reservoir appears dark brown, black, or cloudy instead of clear or light amber. Contaminated fluid can cause internal corrosion and reduce braking performance.
-
Brake Warning Light on Dashboard: The ABS or brake warning light stays illuminated. This may indicate low brake fluid, air in the system, or a pressure imbalance that requires attention.
-
Brakes Feel Uneven: The vehicle pulls to one side when braking, or one brake feels stronger than the other. This can happen when air or contaminated fluid affects pressure distribution in the system.
How to Check Brake Fluid Levels?
To check your brake fluid level, locate the master cylinder reservoir under the hood, usually near the driver’s side firewall. The fluid should be between the "MIN" and "MAX" lines—if it’s low, top it off with the correct type (DOT 3, DOT 4, etc.). Always keep the reservoir sealed to prevent moisture contamination, which can reduce braking performance.
Learn About Warning Signs of a Faulty Brake Master Cylinder
Tools and Materials Needed to Bleed Brakes
You don’t need expensive tools to bleed your brakes. Here’s what you’ll need:
Basic Tools
-
Jack and jack stands
-
Lug wrench
-
Wrench set (for bleeder screws)
Brake Bleeding Tools
-
Brake fluid (check your owner’s manual for the correct type: DOT 3, DOT 4, etc.)
-
Clear tubing (fits over the bleeder valve)
-
Catch bottle (to collect old fluid)
-
Turkey baster (to remove old fluid from the reservoir)
Learn What Brake Fluid You Should Put in Your Car
Optional for Easier Bleeding
-
One-person brake bleeder kit (vacuum pump)
-
Speed bleeders (self-sealing bleeder valves)
-
Pressure bleeder (pushes new fluid through the system)
Step-by-Step Guide to Properly Bleed Brakes by Yourself
Step 1: Prepare Your Vehicle
-
Park on a level surface and engage the parking brake.
-
Jack up the vehicle and secure it with jack stands.
-
Remove the wheels for better access to the bleeder screws (optional).
Step 2: Check and Refill the Brake Fluid Reservoir
-
Locate the master cylinder under the hood.
-
Check the brake fluid level. If it’s low or dark, replace it.
-
Use a turkey baster to remove old fluid if needed.
-
Refill with fresh brake fluid before starting.
Step 3: Find the Correct Bleeding Order
Most vehicles follow this order:
-
Passenger rear (farthest from the master cylinder)
-
Driver rear
-
Passenger front
-
Driver front
Always start with the brake farthest from the master cylinder and work your way closer. Check your owner’s manual for your vehicle’s specific sequence.
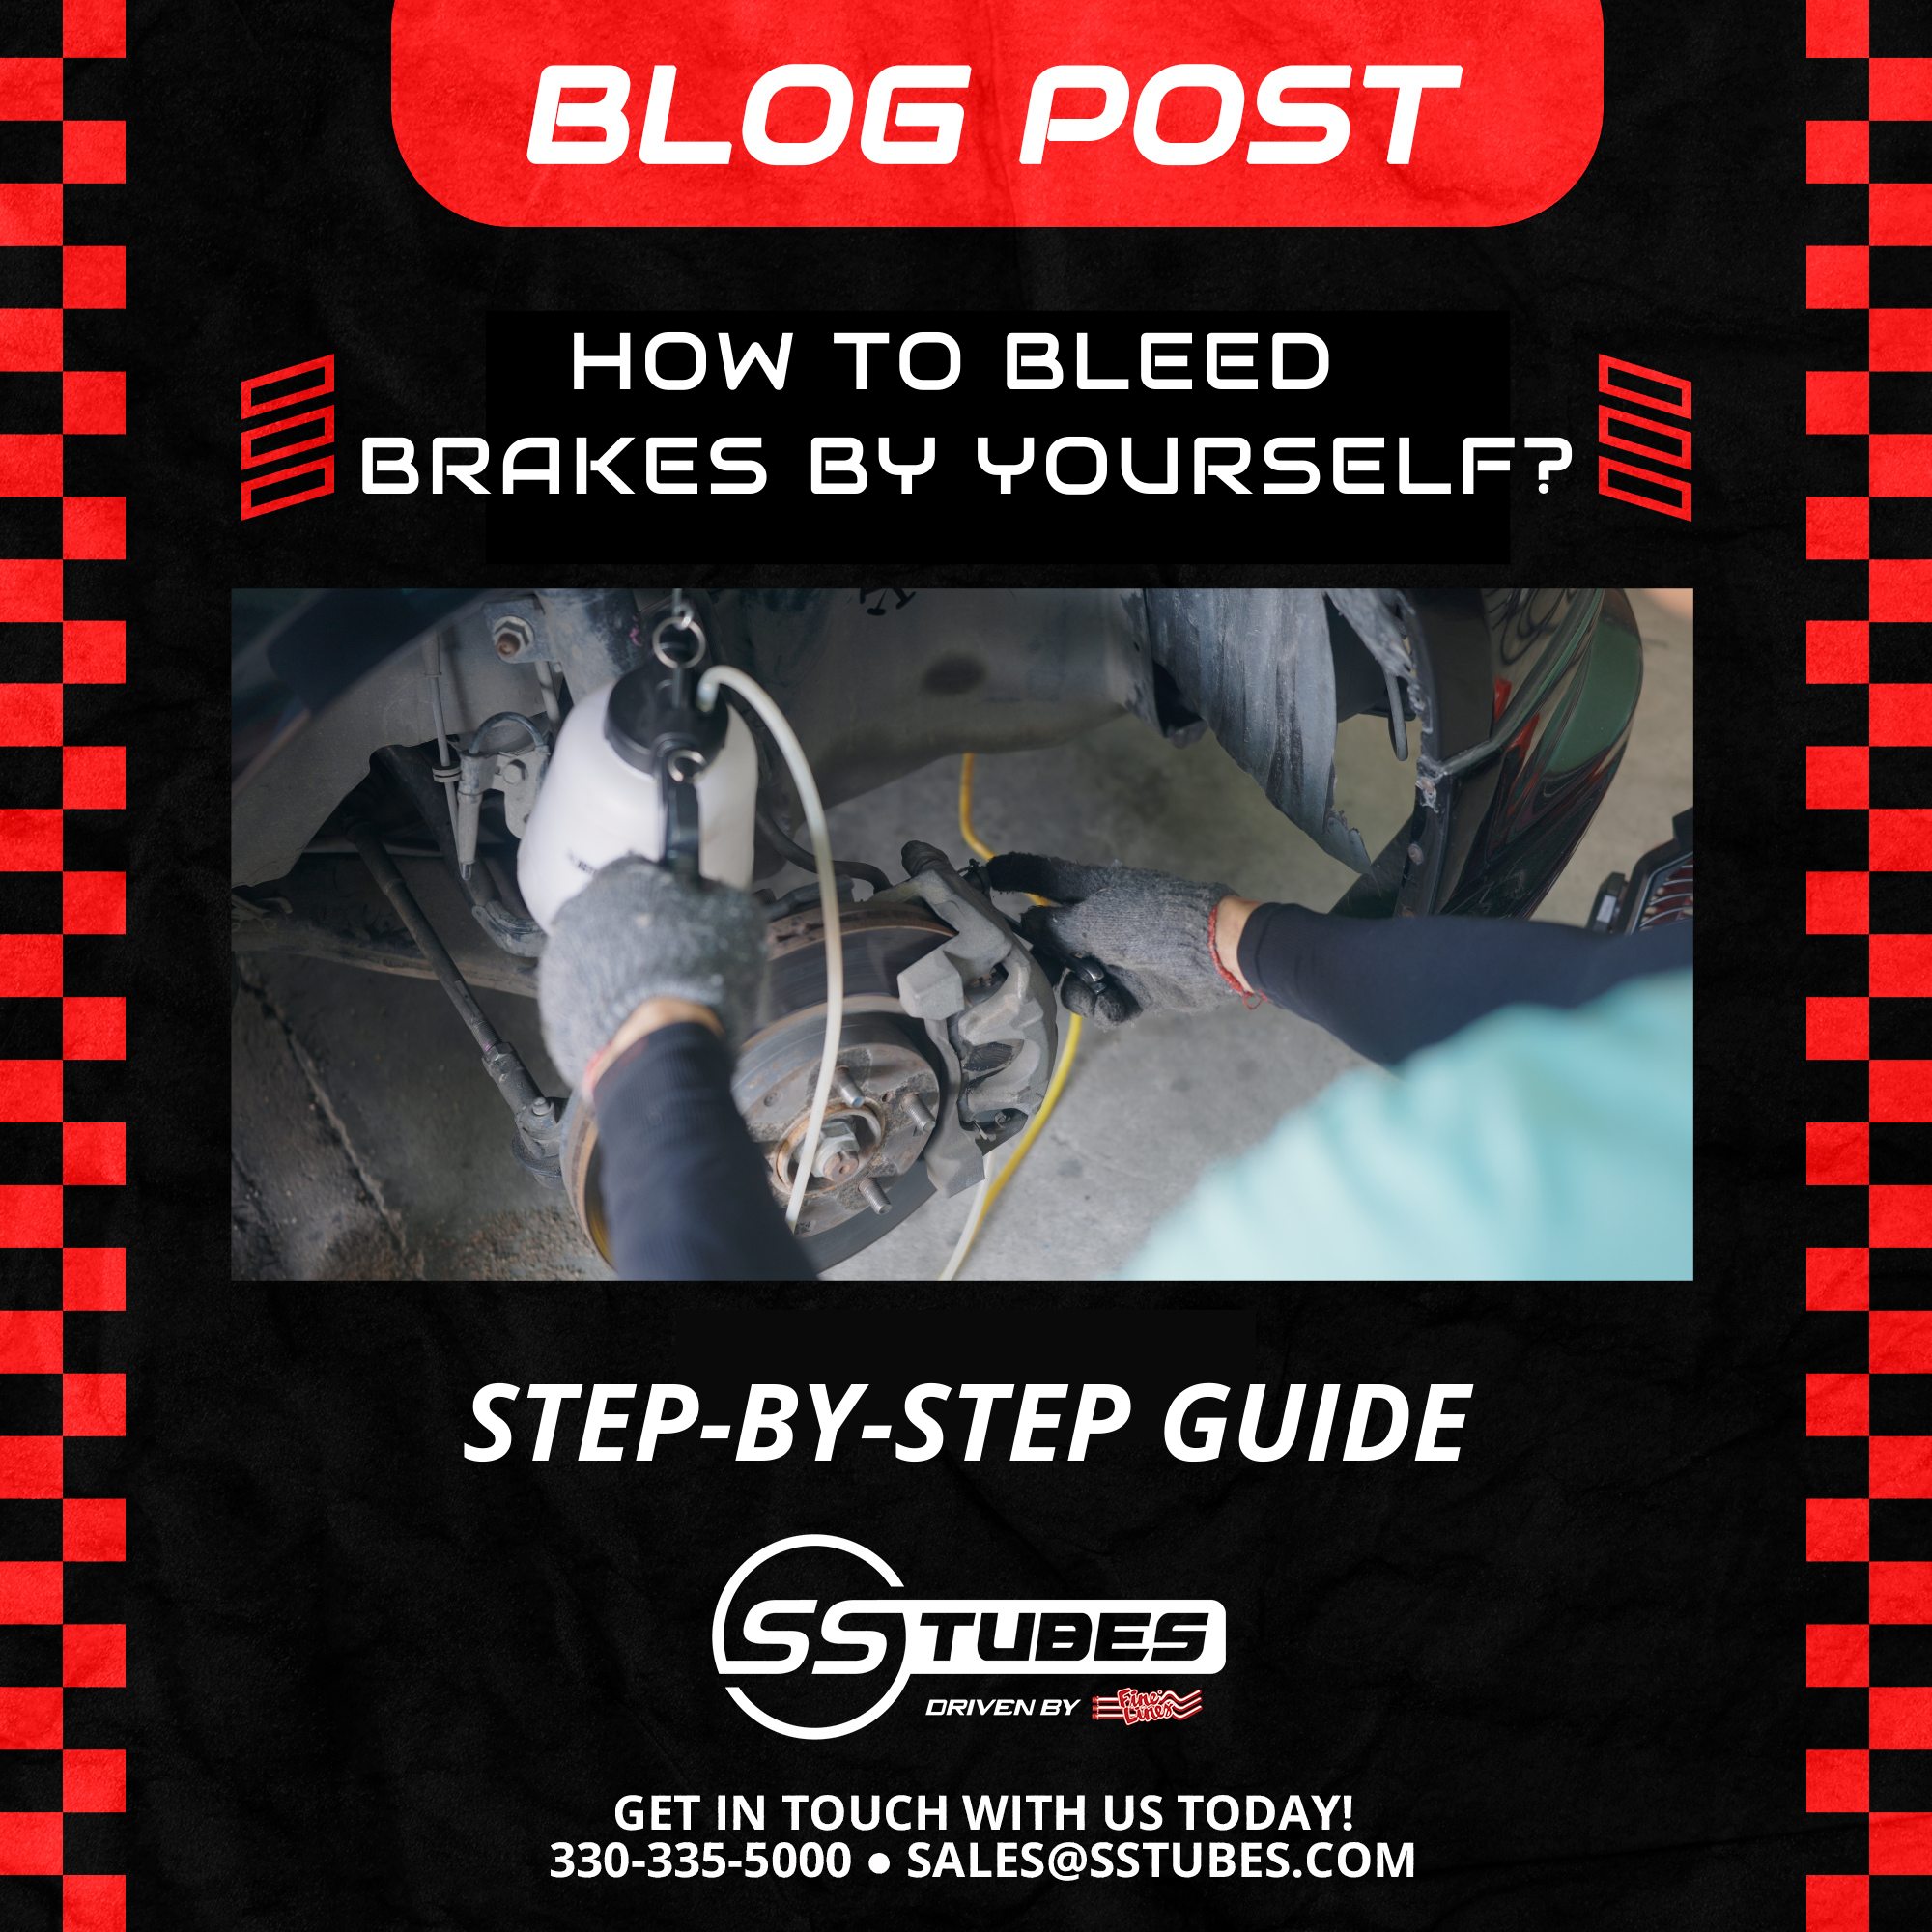
Step 4: Attach the Bleeding Hose
-
Locate the bleed valve on the brake caliper or wheel cylinder. It is a small screw that releases air and old fluid when opened.
-
Place one end of a clear hose over the bleeder valve.
-
Submerge the other end in a catch bottle with some brake fluid to prevent air from re-entering the system.
Step 5: Bleed the Brakes (Manual Method)
-
Press the brake pedal slowly several times and hold it down.
-
While holding the pedal down, slightly open the bleeder valve with a wrench.
-
Old fluid and air bubbles will come out.
-
Close the valve before releasing the brake pedal.
-
Repeat until clean fluid flows with no bubbles.
Step 6: Bleed the Brakes Using a Vacuum Pump (Alternative Method)
-
Attach a vacuum pump to the bleeder screw.
-
Pump to create suction and pull old fluid out.
-
Keep bleeding until you see clean, bubble-free fluid.
Step 7: Refill the Master Cylinder as You Go
-
Never let the fluid level drop too low.
-
Top off with fresh fluid after each wheel.
Step 8: Repeat for All Wheels and Test Brakes
-
Check each wheel and confirm all air is removed.
-
Press the brake pedal—it should feel firm.
-
Take a short test drive to confirm normal braking.
Can You Bleed Brakes Without a Vacuum Pump?
Yes, you can bleed brakes without a vacuum bleeder. The manual method involves pressing the brake pedal while opening and closing the bleeder valve to release air. You can also use gravity bleeding, where fluid flows out naturally, but this method is slower.
Do You Have to Bleed Brakes After Changing Pads?
No, you don’t always have to bleed brakes after changing brake pads. If you didn’t open the brake lines or lose fluid, bleeding isn’t necessary. However, if the pedal feels spongy or the fluid looks dirty, it’s a good idea to bleed the system.
Common Brake Bleeding Mistakes to Avoid
-
Letting the Master Cylinder Run Dry: If air enters the system, you’ll have to start over.
-
Over-Tightening the Bleeder Screws: Use gentle pressure to avoid stripping the bleed screws.
-
Using the Wrong Brake Fluid: Check your owner’s manual to use the correct type (DOT 3, DOT 4, etc.).
-
Not Following the Correct Bleeding Order: Always start with the wheel farthest from the master cylinder.
-
Skipping a Leak Inspection: Check for leaks around the master cylinder, brake lines, and calipers.
Upgrade Your Brake System with SSTubes / Fine Lines
A properly maintained braking system is the difference between stopping safely and putting yourself at risk. SSTubes offers high-quality pre-bent brake lines, master cylinders, and complete brake kits for your vehicle.
Need help finding the right parts? Contact us today and keep your brakes in top condition.